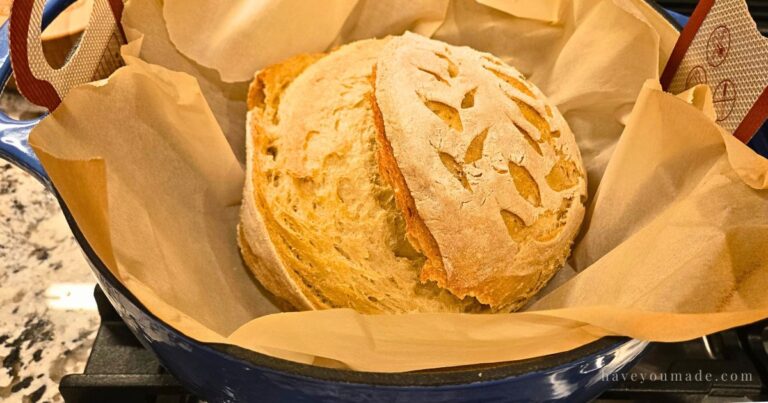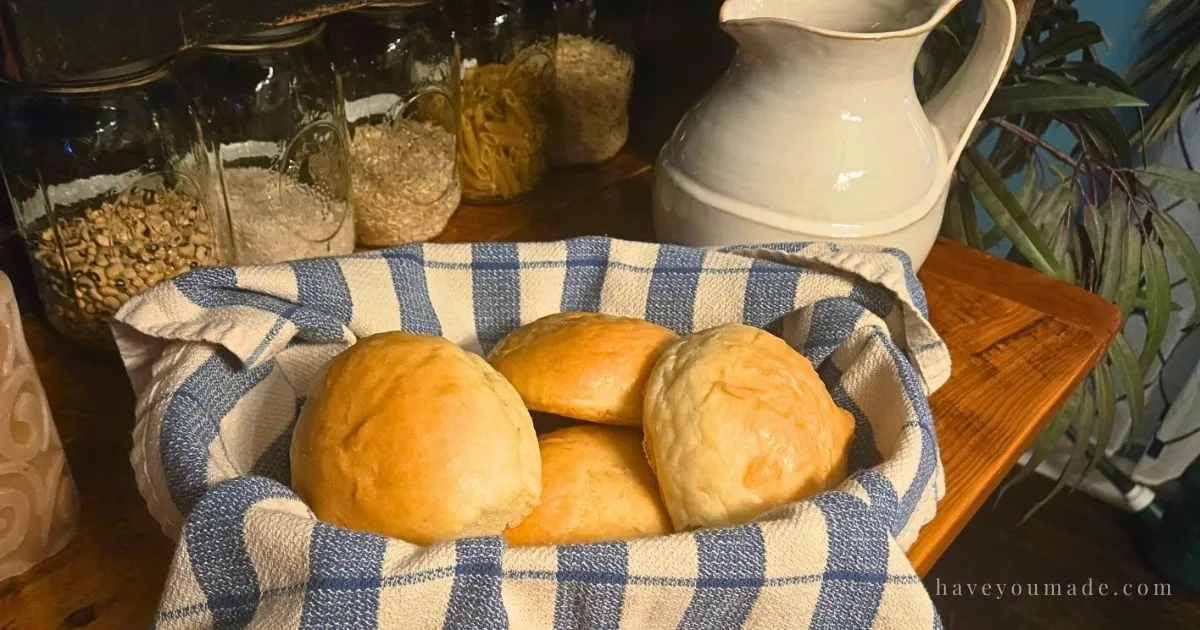
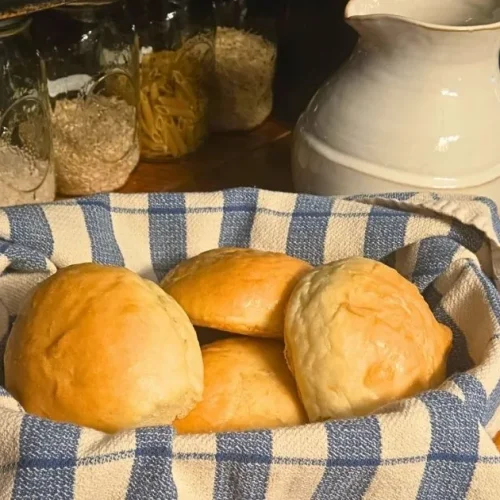
Homemade Yeast Dinner Rolls (Buttery & Soft)
There’s something about a basket of warm, buttery homemade yeast dinner rolls that instantly makes a meal feel special. These rolls weren’t originally planned as dinner rolls at all. They started as a batch of sandwich bread dough. But after shaping the dough into rolls instead of a loaf, the result was a soft, fluffy texture that reminded me of restaurant yeast rolls. If you love tender, pull-apart rolls with a soft crust and buttery finish, this recipe is worth trying.
📌 Don’t lose this one! Save or pin this recipe for soft, homemade yeast dinner rolls that go with just about any meal.
A Sandwich Bread Recipe Turned Into Dinner Rolls
I used my go-to sandwich bread recipe and simply changed the way the dough was shaped and baked. The ingredients and mixing method stay the same. The only difference is dividing the dough into portions and baking it as rolls instead of a loaf.
The first time I made these, I divided the dough into 8 rolls, which baked up beautifully but were larger than typical dinner rolls. For a more classic dinner-roll size, I recommend dividing the dough into 12 rolls. They’re still generous, soft, and perfect for serving alongside dinner. If you want to use them as hamburgur or sandwich rolls, then dividing into 8 would work perfectly.
This is a great example of how flexible yeast dough can be. One solid base recipe can easily become sandwich bread, dinner rolls, or even slider buns with just a few small adjustments.
What Makes These Yeast Dinner Rolls So Soft
A few simple choices make a big difference in the final texture:
- The dough itself is designed to be soft and enriched, which translates perfectly to rolls.
- Brushing the tops with milk before baking helps keep the crust tender rather than crisp.
- Baking on a lower oven rack encourages even baking without over-browning.
- Brushing with melted salted butter after baking adds flavor and locks in softness.
The result is a roll that’s fluffy inside, lightly golden on the outside, and soft enough to pull apart easily.
Shaping and Baking Notes
- Divide the dough into 12 equal pieces for standard dinner rolls (or 8 for extra-large rolls).
- Shape each piece into a smooth ball and place on a baking sheet or in a baking pan.
- Brush the tops lightly with butter before baking.
- Bake at 350°F, using a lower rack in the oven.
- Bake until lightly golden and the rolls spring back when gently pressed.
Right after baking, brush the hot rolls with melted salted butter. This step makes a noticeable difference in both flavor and texture.
Optional Honey Butter Finish
If you like a subtle sweetness, you can stir a small amount of honey into the melted butter before brushing the rolls after baking. The heat from the rolls helps the butter soak in, adding flavor without making the tops sticky.
This is completely optional; the rolls are excellent with plain butter as well.
New to Bread Making?
I didn’t take step-by-step photos for these rolls, but if you’re new to working with yeast dough, I’ve linked a couple other bread posts below that walk through kneading, rising, and shaping with detailed photos and explanations.
Those posts cover the same techniques used here and can be helpful if you want a little extra visual guidance.
A Simple, Flexible Yeast Roll Recipe
These homemade yeast dinner rolls are soft, buttery, and perfect for everyday meals or special occasions. Because they’re based on a reliable sandwich bread recipe, they’re straightforward to make and easy to adapt.
Whether you serve them warm with butter, use them for sliders, or tuck one onto your plate for soaking up sauce, these rolls are a simple way to bring homemade bread to the table.
Homemade Dinner Yeast Rolls
Ingredients
- 1 cup warm water about 110°F
- 1/4 cup whole milk warmed to about 110°F
- 1 package active dry yeast about 2 1/4 teaspoons
- 2 tablespoons sugar
- 4 tablespoons unsalted butter room temperature or melted and cooled to about 110°F
- 1 1/2 teaspoons salt
- 3 1/3 cups all purpose flour or bread flour
- 3 tablespoons salted butter melted
Instructions
Proof the Yeast
- Pour your packet of yeast into a large mixing bowl and add warm water. Stir gently, then cover the bowl with a lid, plate, or clean kitchen towel.
- After about 10-15 minutes, the surface should look foamy. If no foam appears, the yeast is no longer active. Just start over with a fresh packet.
Mix the Dough
- Add salt, sugar, warm milk, and butter to the yeast mixture and stir with a fork or dough whisk until well combined. Add the flour and mix until all of it is incorporated. The dough should be shaggy and slightly sticky, but your whisk or fork should pull away easily.
- If the dough seems too wet, sprinkle in a bit more flour. If it’s too dry, add a tablespoon of water at a time.
- Cover the bowl and let the dough rest for 30 minutes.
Stretch and Fold the Dough
- After 30 minutes, lightly wet your hands to prevent sticking. Perform a few stretch-and-folds:
- Pull one side of the dough up and fold it over the center
- Rotate the bowl
- Repeat with the next side
- You don’t need to pull the dough very high. Even a short stretch helps develop gluten and strengthen the loaf.
- Cover the bowl again and let rest another 30 minutes. Repeat a second round of stretch-and-folds.
Shape the Dough
- Lightly flour your countertop and gently turn the dough out of the bowl.
- Separate the dough into roughly 12 equal portions.
- Gently fold them into a ball shape, pinching the seam together on the bottom of the roll.
- Place the dough seam-side down on a piece of parchment paper on a baking pan or spray the pan with cooking oil.
- Lightly sprinkle the roll tops with flour and rub across the tops. Cover with a clean kitchen towel and allow to rise for a final 30 minutes.
Preheat the Oven
- During the final rise, preheat the oven to 350°F.
Butter and Bake
- Brush the tops of the rolls with melted salted butter.
- Place pan in oven and bake 20-24 minutes or until the rolls are golden brown on top.
- Remove the rolls from the oven and brush the tops with more melted butter if desired.
Notes
- For standard-sized dinner rolls, divide the dough into 12 portions. Dividing into 8 portions creates larger, sandwich-style rolls.
- Brushing the tops with butter before baking helps create a soft, tender crust.
- Bake on a lower oven rack to help prevent over-browning on top.
- Brush the hot rolls with melted salted butter immediately after baking for extra flavor and softness.
- These rolls are best served warm but remain soft for several days when stored in an airtight container.
- For a slightly sweeter finish, stir a small amount of honey into the melted butter before brushing the rolls.